I had read about the following tip awhile back and never bothered to try it...but now that I'm 40(ish!) and could really
use reading glasses more than I care to admit, it's nice not to have to read words backwards!! When I only had a few
phrases, it wasn't a big deal, but these days I am hoarding alphabets and sayings and with the great new styles of fonts...well,
it has been tough at times!
So here is the tip!!
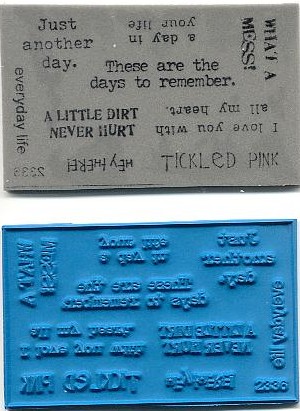
1. Before you stick your cling to your rubber, ink up the images with black stazon ink. Keeping the images
together in one piece, uncut, just as they came makes this easy.
2. Peel off the paper on the non sticky side of the Creative Cling (aka ez cling).
3. Lay down the non sticky side on top of your inked up rubber stamp images.
4. Clean the rubber off and dry it up.
5. Peel off the paper on the sticky side and attach the rubber to it. BE SURE YOU ARE PLACING THE IMAGES
IN THE SAME DIRECTION!! You do have to think about it for a minute when you are doing it!
6. Cut your images apart...be sure to use the actual rubber side as your cutting guide, not the stamped cling
side! It should be pretty close.